


3D Scenes and Digital Twins
A 3D scene puts models, areas, and device markers in the same space. Use Campus Spatial Monitoring to inspect the offices and R&D area, manufacturing area, and logistics area. A model with status labels does not establish a device connection.
1. Before You Start
| Item | Details |
|---|---|
| Entry point | Visualization → SCADA Management → 3D Scenes |
| Permissions | Search and preview. Opening the editor or maintaining models and devices requires the corresponding permissions. |
| Reference case | Campus Spatial Monitoring is a standalone 3D project with no devices bound in this example. |
Search by project name or number for Campus Spatial Monitoring. Confirm the card says 3D, Standalone, and Saved, then click Edit to open the scene editor. If the project does not appear, reset the filters, refresh, and wait for the list to load.
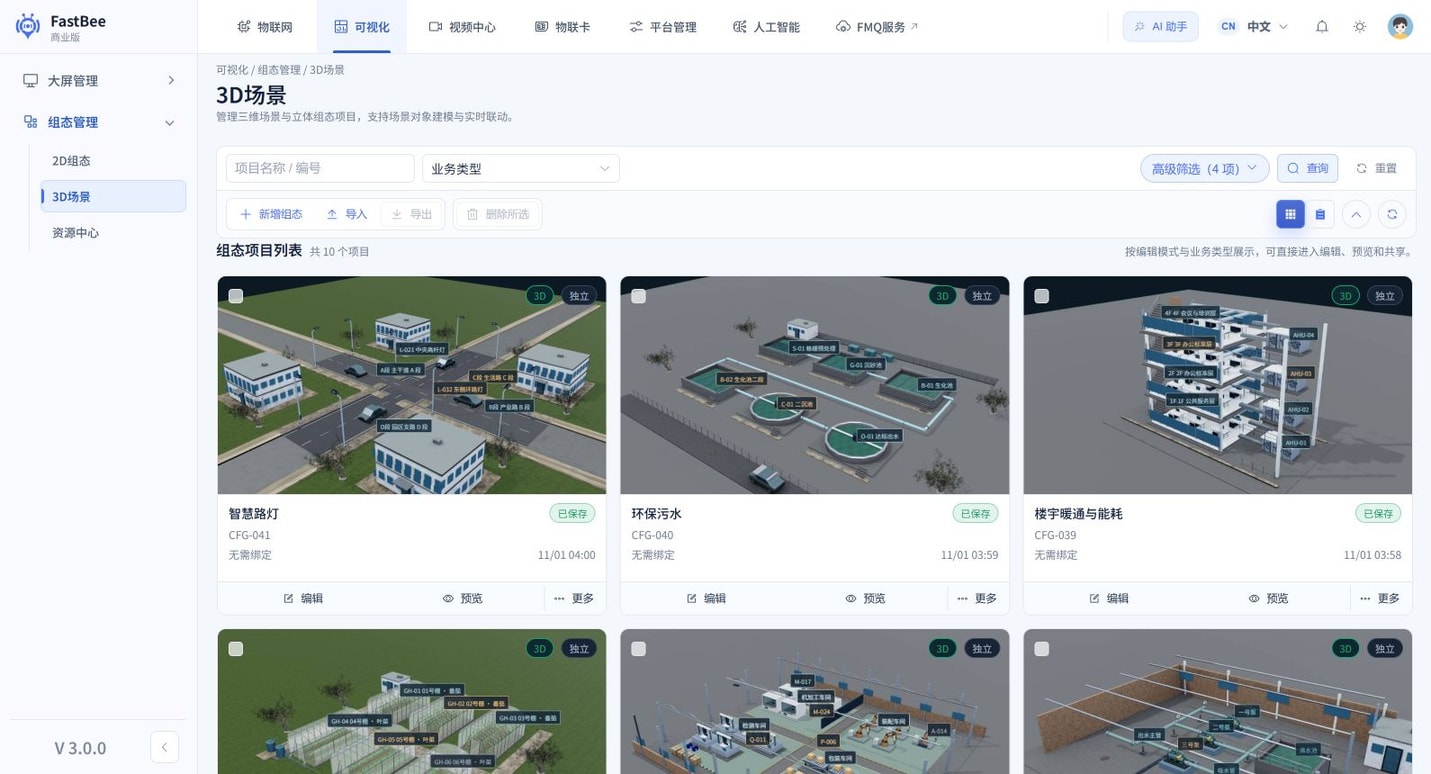
Follow the screenshot: The figure shows the unfiltered project list. After finding Campus Spatial Monitoring, check for the same 3D and Standalone labels shown on the example cards to avoid opening a similarly named 2D view. Select Edit at the bottom of the card to inspect nodes, models, and properties, or Preview to view the campus and its labels. A cover image in the list does not mean the runtime model has loaded.
2. Inspect Models and Scene Objects
- Switch to the object list on the left and search for the Smart Campus model. Locate area nodes such as Offices and R&D, then compare them with the viewport to distinguish the base model from individual labels or data points.
- Switch to the resource panel and use Search Resources to find models available to add. For an existing project, check the object list first. An empty resource search does not mean the models already in the scene were deleted.
- To use a new model in your own project, confirm it is available under SCADA Management → Resource Center → 3D Models. Use Add Model in the editor, or drag the model from the resource panel into the scene. For maintenance and replacement, see the Resource Center.
3. Verify Preview and Device Data
Open Preview from the project card and wait for buildings, roads, and data point labels to appear together. Then choose a guide:
| What you need | Guide |
|---|---|
| Adjust model positions, node labels, and the initial view | 3D Scenes, Objects, and Layout |
| Read device reports from a node or dashboard | 3D Device Binding, Properties, and Data |
| Configure a click action or animation and check control boundaries | 3D Events, Animation, and Control |
| Check resource loading, access, and operation | 3D Preview, Delivery, and Operation |
Display vs. Live Linkage
Campus Spatial Monitoring is useful for demonstrating a scene, but it has no bound devices. It verifies model and label rendering, not live linkage or device commands.